Pages

Thursday, March 27, 2014

Warming it Up!


This afternoon I got out my new Setacolor paints and foam flower stamps and went wild with some hot colors!  Really warmed things up, didn't it?  This is the second part of my "opposites" piece, so now I'm working with flowers instead of snowflakes.  It's a welcome change!

Earlier this morning, I had the chance to run over to a new closer-to-home JoAnn's Fabrics, and picked up all these sheers in similar hot shades.  This evening I layered them with fusible webbing, so tomorrow I'll be able to start cutting out flower shapes and adding them all over.  This piece is supposed to be finished in one week, so I'm trying to make the most of each day.  But if I want to layer it, add some quilting and embellishments, I may need to give myself some extra time.  The NSQG show isn't until early May, so I just might be able to swing that...  Stay tuned...

Monday, March 24, 2014

More Snowflakes!


Even though most of the snow is gone and I'm finally starting to see some real signs of spring,  the cold winter air is lingering!  There's even a few snowflakes in the forecast for tomorrow.

Maybe that's a good thing, because I have to finish stitching these snowflakes on my latest piece!  Every time I attempt a piece that includes snowflakes, I get caught up in the "no two are ever alike" trap.  It may be easy for Almighty God to never make two the same, but it's a real challenge for me, and I'm only making a few!  This time, to give myself a framework that might simplify it, I fused webbing on the back of several different sheer fabrics, peeled off the backing, folded them like a paper snowflake, and then snipped away.  The results were all different and pretty, but some of the fabrics were so sheer that when I fused them onto the background, they were hardly visible!  This made for quite a challenge trying to add stitching by machine or by hand.  I've used several different threads and the combination of machine and hand stitching has made for a nice variety.  Here's another sneak peek:


I hope to have these all done soon, not just because of my looming deadline, but because I want to get on to the next part of the piece which includes warmer colors!  Maybe by then we'll actually have some crocuses and snowdrops blooming...

Sunday, March 16, 2014

Winter into Spring

Last week, our backyard still looked like this:

We had our last significant snowstorm almost exactly a month ago, but it's been so cold that not much has melted - until this week!  I've been taking a quick photo of the garden every day to show the coming of spring, and today it looks like this:

It's so nice to finally see the path and pond again!

These photos have been good inspiration for my next project, which had to fit into the theme "opposites."  I decided to do a winter-into-spring piece.  I picked up some white cotton-linen fabric last weekend and spent some time on Thursday splashing it with paints in pale blues and lavenders, with some snowflake stencils used as masks to keep some areas white.  When that was dry, I layered some additional stenciled snowflakes on top of those with white paint.  Finally, I cut some snowflakes out of white and sheer fabrics, and am now in the process of stitching them on by hand and by machine.  Here's a sneak peek:


This project is due in early April, so I'm trying to do a little work on it every day.  Considering this was a piece of plain white fabric on Thursday morning, I'd guess that if I keep up this pace, I'll get it in on time...  Hope I can keep up the momentum!

Thursday, March 13, 2014

Thankful Thursday


This was one of those weeks when I really had to force myself to sit down and think of things I'm thankful for.  Why is it so easy to see the negative instead of the positive?  I came across something on Pinterest that said, "It doesn't matter whether the glass is half empty or half full - Be grateful you have a glass and there's something in it!"  So rather than complain about the cold weather today, I'll choose to be grateful that spring begins in one week, much of the snow has melted, and I actually saw daffodil shoots pushing up out of the ground yesterday!  Yay!

I also splurged on this Lenten Rose (hellebore) at the grocery store on Sunday.  Isn't it gorgeous?  I'm enjoying it's delicate beauty in the kitchen every morning and I can add it to the garden and look forward to it blooming again every year.

Finally, I'm thankful that I had the day off work today, and I actually spent it (mostly) doing things for myself (although I did change the bedsheets, do a couple of loads of wash, and made a quick trip to the grocery store...).  But I got to spend most of the day involved in my next art project, which I'll post at another time.  Meanwhile, here's another spot of green from my kitchen - I finally found a petite fern to fit inside this little teacup.  Isn't it cute and cheerful?  Although I'm thinking it might need a little something whimsical added to it, like a rock with a word on it, or a little polyclay figure or something...

Monday, March 10, 2014

So Proud!

 Have you seen the cover of the spring Adult and Continuing Education Programs from Putnam Northern Westchester BOCES?  Isn't it great?  Don't you love the tree, shaped like a brain with leaves that resemble the brain's surface?  And the branches that look like arms, reaching up to the sun?  Isn't it innovative and clever and well done?  I agree - it's totally witty and unique!  Want to know why I think this is the best cover PNW BOCES ever had on it's program brochure?  Look carefully below:
Woo Hoo!  Her first professional cover!  This brochure is mailed to every home in Putnam County, and many in Westchester as well - what an accomplishment!  She's on her way!  I'm so proud and in awe of her talent and accomplishments at such a young age!

Thursday, March 6, 2014

"Tuscan Window" Ta-Dah!


It's finished!  How do you like the addition of the copper wirework?  I actually had something like this in mind from the beginning, but then I made the landscape view outside the window so detailed that I thought anything in front would obscure it.  But without the scrollwork, it felt empty to me, like it needed more of a frame.  So this is what I came up with!

Creating it was more complicated than I thought it would be (isn't everything?).  I found the thin copper tubes and wire at the hardware store, then watched this video on soldering copper wire.  She makes it look so easy and doable!  So over the weekend I picked up an inexpensive soldering iron and one of those little "third hand" jobs.  I knew my DH already had solder and flux at home, so I thought I'd just use those.  But for some reason, the solder wouldn't stick to the copper.  I got it to melt, but it just dripped all over everything and rolled off onto the table.  I thought maybe the flux was contaminated or the solder was the wrong mix of metals, so I went back to the hardware store for new packages of each.  Tried it again;  still didn't work.  By then I was wishing I had picked up the more expensive soldering iron kit that contained the right solder for the iron rather than buying everything separately... Live and learn!

At this point, time was running short and I didn't want to keep buying more solder only to have the same poor results.  It just so happened that on one of my trips to the hardware store, I saw this product on the shelf:

It's intended for connecting fitted pipes, but is supposed to have a bond as strong as soldering so I thought I'd give it a try.  To make the outside frame, I connected the narrow copper tubes by inserting a short piece of wire into each end of the tube and cementing it with the "Just for Copper."  Then I wire-wrapped places where the curved wires met the frame and put on another drop to cement it.  It may have been more work in the end, but the results were still pretty to look at.  I just hope the bond is truly as permanent as the product claims.  I let everything cure overnight and then stitched them on as if they were hinged, so they open:


I have to admit, I'm quite pleased with how it turned out!  I think it captures the feeling of the palazzo- hotel we stayed at in Siena, which had such beautiful architectural elements, and breathtaking views of the Tuscan countryside.  This piece will be shown next month at a new fiber arts shop in Larchmont, NY called Etui Fiber Arts, along with other "architectural elements" pieces by my fellow FANE-ers.    

Sunday, March 2, 2014

Spring Break


Even though it is still VERY wintry outside, I decided to make it look like spring inside on my decorative mantle in the dining area.  I saw an advertisement for pinwheels in the Christmas Tree Shops circular and thought they looked so cheerful and springlike, blooming like flowers stuck into little flower pots.  I never made it over to Christmas Tree Shops, but I picked up the little pinwheels at Michael's Crafts (the girls and I have been making regular trips there lately - we just can't seem to resist all the colored glassware, spring flowers and decor they've been featuring!).  Then I played around with making a larger pinwheel using some scrapbooking paper and giftwrap I had.  I stuck a pin through the center and pushed it into some striped paper straws they were selling.  Cute, huh?  I'll have to make a couple more...

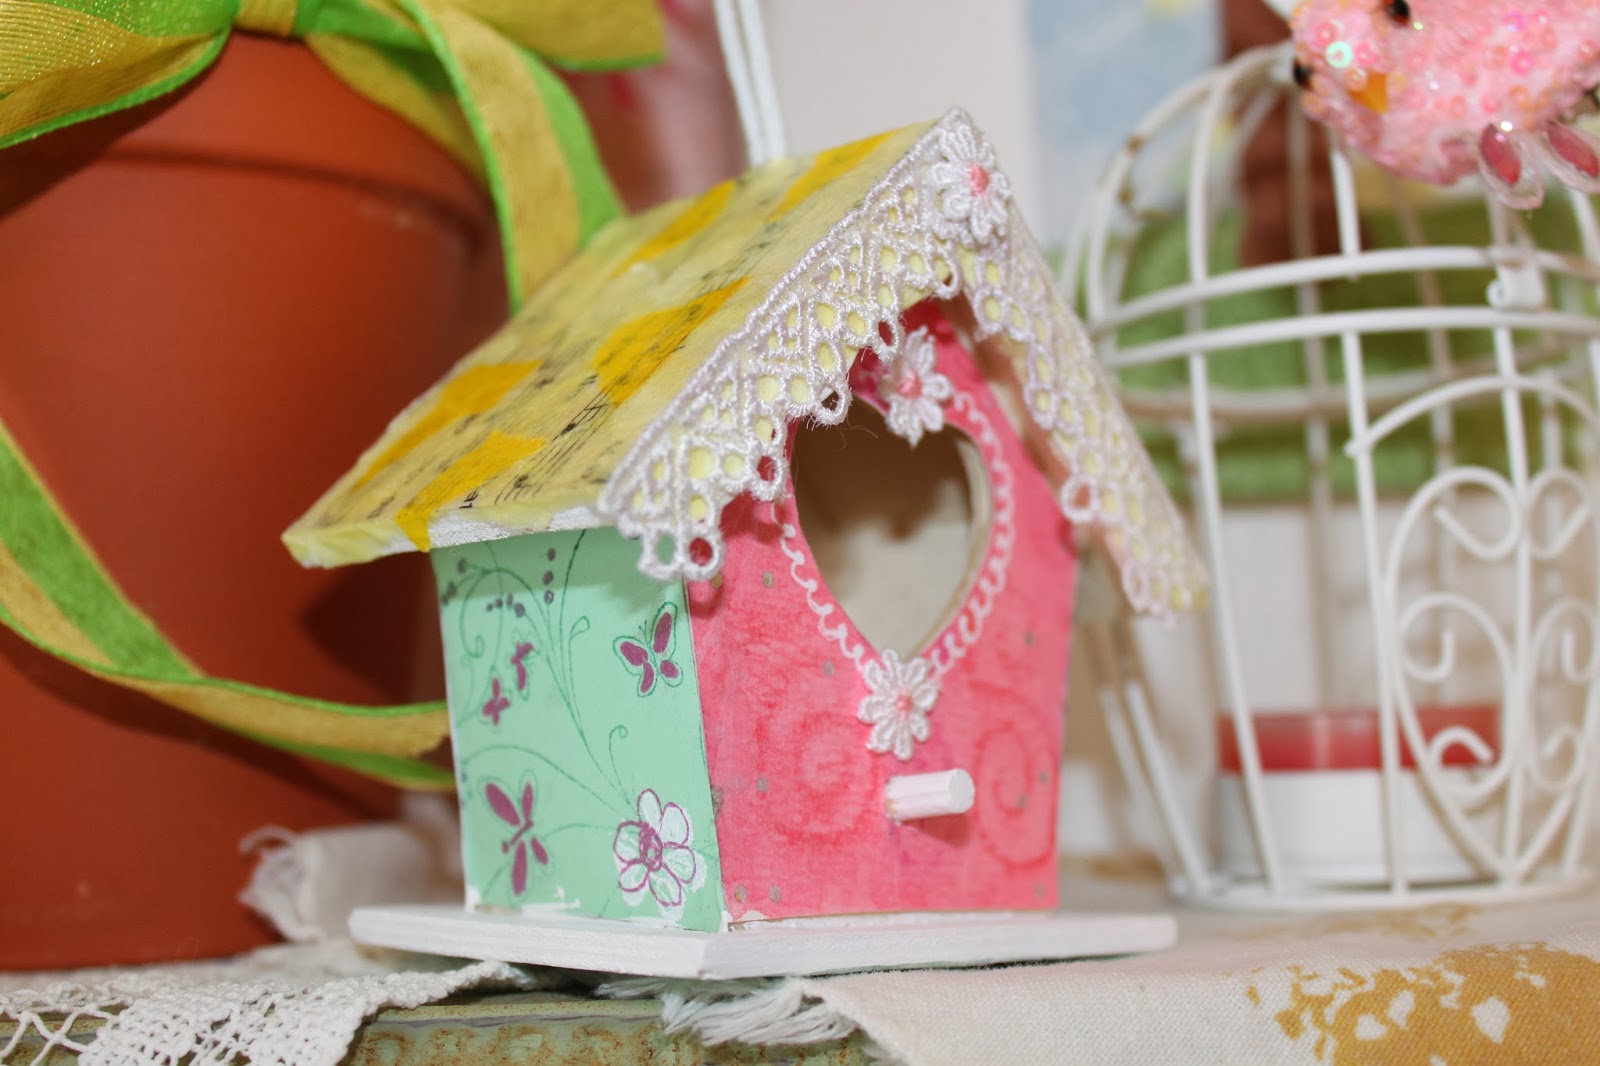
I also picked up three of these little wooden birdhouses for a $1 each - couldn't resist! - and had a lot of fun going through my stash of papers, ribbons, and assorted ephemera to decorate them.


After putting down an initial coat of white paint, I mod-podged tissue paper over most of this round birdhouse.  I later added the leafy stamps on the roof, and the ribbons, lace, and daisy trim all over.  I just love it!

 This one I covered with assorted papers from my stash, some scraps leftover from other projects that I had stamped or painted. I also embellished it with lace and daisies.  I think it's so cute!


Sticking with a pink, green, and yellow color scheme, I decided to use my "Spring Trees" tryptych in the center of the mantle (I made it for last year's FANE show).  I added more Gerber daisies (also from Michael's) in a mix of colors, some candles I had in my spring decor box, and some houseplants decorated with the pinwheels.  I nestled the birdhouses down in front.  Doesn't it look cheerful and springy?  Gives your spirits a little lift just to look at it - and such a relief from the perpetual gray outside!

While we were out shopping yesterday, we stopped at Harbor Freight and I was able to get the things I need to practice soldering, so that'll be the next thing on my fun to-do list.  I'll let you know how it goes...