 Here is my latest charm cluster necklace. I stuck with the same pale blue, crystal, and white color scheme to suggest snow, but didn't put any actual snowflakes on this one. I picked up some metal clasps for use with ribbons on one of my latest shopping sprees, so this necklace hooks in a more professional way (I'm not averse to knots, but I figure if you're paying good money for something, you want a little better caliber than that!). Anyway, check out my Etsy shop as well as the Etsy site in general for really cool and unique handmade and vintage gifts this year!
Showing posts with label etsy. Show all posts
Showing posts with label etsy. Show all posts
Tuesday, December 6, 2011
Latest Addition
Here is my latest charm cluster necklace. I stuck with the same pale blue, crystal, and white color scheme to suggest snow, but didn't put any actual snowflakes on this one. I picked up some metal clasps for use with ribbons on one of my latest shopping sprees, so this necklace hooks in a more professional way (I'm not averse to knots, but I figure if you're paying good money for something, you want a little better caliber than that!). Anyway, check out my Etsy shop as well as the Etsy site in general for really cool and unique handmade and vintage gifts this year!

Sunday, November 13, 2011
Another Charm Bracelet
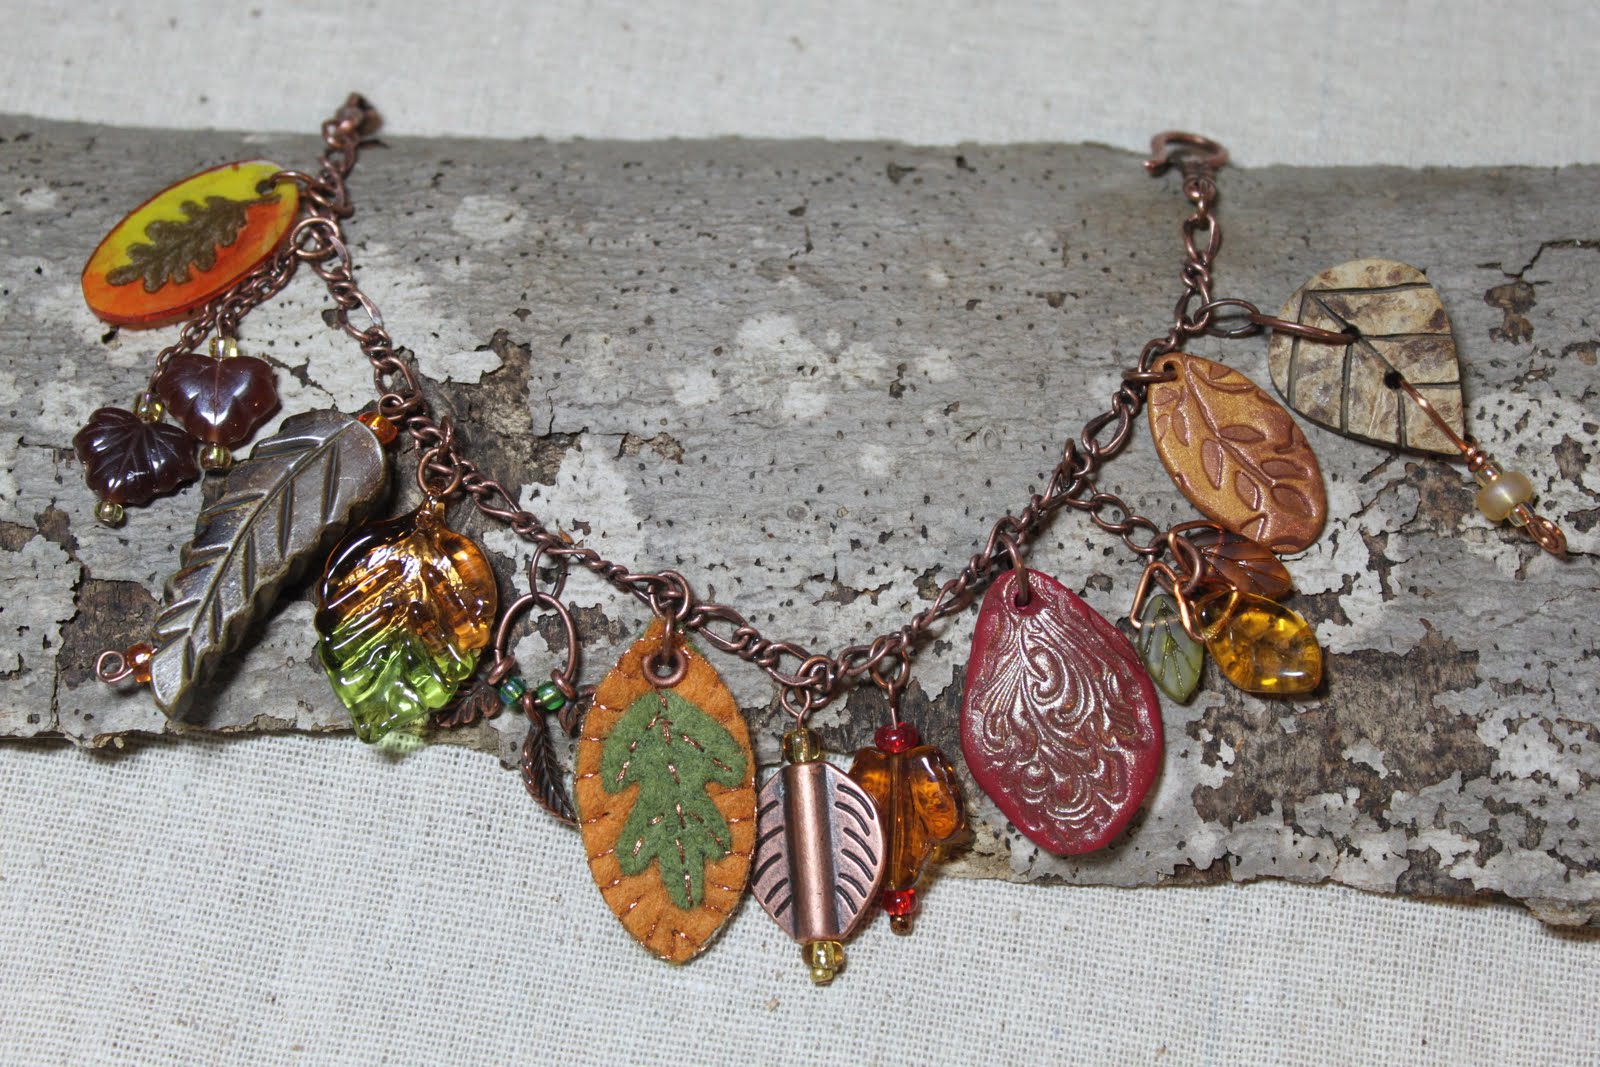 Here is another bracelet I finished this week and listed in my Etsy shop. It's got a nice range of fall colors and a variety of shapes and materials, all with an Autumn theme. It's probably a bit late in the season to be posting it, but I like it, so I thought I'd give it a shot. (Right now, I'm working on a second one for myself!). I hope to have some more winter themed things out soon, since Christmas shopping is on everyone's minds already!
Thursday, November 3, 2011
"Going Green" Charm Bracelet
 I finally got some more copper-plated chain and have started putting together some more charm bracelets with some of the charms I crafted earlier this fall. I'm really happy with how this one turned out! It's a nice mix of materials and shades of green and has a nice earthy, organic look to it. Look for it in my Etsy shop!
Friday, October 21, 2011
More Autumn Inventory!
 As I mentioned in my previous post, last night I held my "creative playgroup" at the library. The women were very enthusiastic and willing to experiment and play with all the materials I brought. We especially had fun playing with the stamps, inks, and pearl-ex powder. This afternoon when I finally sat down to do something creative for an hour or so, I started putting away all the materials from last night, when I decided to play around with everything a little more on my own. I managed to come up with some new color combinations with some of the various stamps. As you can see, I'm even planning ahead a bit and getting in some wintry motifs!
Of course, I was partial to the autumn-toned pieces. I made a bunch of them so I can use them for charms on some of the bracelets I hope to finish up soon. But I also attempted getting two pieces to match close enough to be a pair of earrings - and I succeeded! I think the key is breaking off two same-size pieces of clay and working them together, step by step, rather than completing one and then trying to make a second just like it. Anyway, look what I came up with! I used metallic gold clay with the copper pearl-ex powder and added a few glass beads to the hanging wires. I added these to my etsy shop tonight, but I liked them so much, I made an extra pair for myself!
 I used metallic gold clay with the copper pearl-ex powder and added a few glass beads to the hanging wires. I added these to my etsy shop tonight, but I liked them so much, I made an extra pair for myself!
Thursday, October 20, 2011
Busy Week!
 I feel like I've been running full tilt since my last post on Saturday! The girls have been busy with activities, I had a few extra programs this week at the library, and I have my adult evening craft program tonight ("the creative playgroup for women") - we're making polymer clay beads and charms. I took 15 minutes here and there to stitch these leaves onto the heavy interfacing to turn them into autumn coasters. What do you think? I like them, and they're fairly quick to put together. Next time I'll cut the fabric before I print the leaves; it took way too long cutting the fabric up into neat 4-inch squares after they were printed!
 I have an opinion question for anyone out there reading this: In the past, I've covered the top of my fabric coasters with a fusible vinyl to protect them. I'm wondering if I should do that here. These are not pieced, so they may not need as much protecting, and I think people may prefer to be able to feel the texture of the fabric and stitch (I know I do). But they are not as protected without the vinyl and may be in danger of being stained by wine, coffee, etc. (Maybe I should go with the vinyl...) Anyone out there got an opinion? I'm looking forward to getting these posted on Etsy...
Friday, October 14, 2011
Trying to Add Inventory
 Now that I have an Etsy shop, I'm trying to add items to sell! I've read that you're better off adding one new item per day rather than adding all your items at once. This way you get listed on the "What's New" list, and it's possible your items will be noticed more. And even though I have several other bracelets I can list, it's difficult to find the time to photograph them well and get them listed. I also wanted to list more autumn-themed pieces like the one above - it's been laying around my "almost finished" pile for two years now - but first I had to finish it! I put it on my blog back in September of 2009 (see it here) when it was just the collage - no borders or finished edges. Today I bought a stretched canvas with the intent to attach it to that somehow, but the premade sizes weren't quite right (the orange felt rectangle is 10"x 6"). I ended up backing it with the two different burlaps and adding the decorative hand stitching. It definitely looks much more finished and professional than it did! I even like this photograph of it - but I neglected to sign it! Better get back to the sewing machine, stitch in my signature and rephotograph it!
Friday, October 7, 2011
Open for Business!

Announcing the grand opening of my very own ETSY shop! Above is the banner I created this week using the free program called "gimp." Do you recognize the background? It's a section of my "Waterfall" piece that was in the show last month. I've been ruminating on my "brand" - colors, font, the general image I want to project. I think I've captured it, between the flowing and sparkling fabric "water," to the coppery lettering.
And below is my new mascot! I've made several versions of him, but I definitely like this one the best. I sponged copper acrylic paint on the wrong side of a commercial print fabric, then fused it to a pale green felt. This prevented a lot of fraying that I get with just the fabric alone. The real coup was his spine ridges. In the past, I've tried to cut them out by hand with a scissors, but I always wanted to try to incorporate rick-rack somehow. I have yards of a very small pale green rick-rack that I painted with the same acrylic paint and stitched along his back. I think it's a vast improvement. I also managed to get a bit of an expression on his face. What do you think? Isn't he cute? I'm using him as my "avatar" instead of a picture of myself. I think it says more about me and my art than my own face would.
 I also decided to take a leap of faith and donate 5% of any profits to a non-profit research foundation called "Project Seahorse." The worldwide seahorse population has been dwindling rapidly over the last few decades and Dr. Amanda Vincent founded the organization to study seahorses and work with fisherman around the globe to prevent any further damage to their populations and ecosystem. I just love seahorses; maybe it's because they almost seem like something imaginary, like unicorns, only they're real. They're just so darned cute and interesting to watch!
So anyway, hop on over to my new ETSY shop (I'll have to add a link on my blog somewhere soon) and tell your friends about it too! Every purchase helps save the seahorse!
Subscribe to:
Posts (Atom)