Pages

Showing posts with label charms. Show all posts

Friday, January 15, 2016

Ups & Downs


This was definitely a week of ups and downs!  In my last post, I mentioned that I had driven to JoAnn's Fabrics specifically for a certain variegated metallic thread, and ended up picking up a few other fun things while I was there.  Well, when I finally got the time to sit down and maybe do a little free-motion stitching on the Fiber Fall pieces, I COULDN'T FIND THAT THREAD!  It was listed on the receipt, I had all the other threads and things I bought, I looked in the car and all over the floor of the studio - no thread!  I finally called the store to see if anyone found it there behind the register or anything, and they said no, they hadn't but if I came in with the receipt, they would replace it for me.  That was very kind and generous of them, but it meant making another long drive back to JoAnn's which is about 35 minutes away.  AGHHH!  Anyone else feel like you go two steps forward and then one back?  

Luckily, I only worked Monday, Tuesday, and Wednesday, so I was able to nip on back over there today and pick up the thread - AGAIN!  Meanwhile, I also helped my oldest daughter register for classes at the local community college (a new experience for us both, as I didn't grow up around here and had never been to the campus before this week), and also received the art charms, above, in the mail, two bright spots in the week.  I participated in a swap through the Artcharms yahoo group I belong to (haven't done that in a long time but couldn't resist the theme of denim and crystal).  In December, I played around with some denim and crystals I already had at home and created the charms in the center of this picture, with the lace flowers with crystal centers.  I kept two of them to wear as earrings, and now I have a bunch I can put on a bracelet.

I also managed to get some parts of my studio cleaned up and looking neater, even without a snow day.  Below, you can see my improved fabric storage.  I already had the boxes and shelving, but never took the time to cover the ugly black grid label printed on the fronts.  I had thought about covering each box front with fabric to indicate the color stored in it, but was reluctant to use my nice fabrics for that purpose.  As I was cleaning, I came across some construction paper, and decided solids would probably look neater anyway, so I began gluing them on.  I've covered most of them and the overall appearance of the shelf is much neater, don't you agree?  I still have about 5 more to do.
 I did use fabric on the floral-covered box (I keep my multi-colored fabrics in there) and was kind of surprised how easy it was to cut and glue on using diluted gel medium. (Maybe I could add a strip of fabric along the bottom of each box face...?)

Anyway, while I was out today, I picked up a few new storage containers to neaten up some of my other shelves and I still have the whole weekend to get in there and get going.   What creative plans do you have for the weekend?

Saturday, February 1, 2014

Inching Forward


As the winter days slowly progress farther from the new year and closer to midwinter and Valentine's Day, I find my spirits lightening a little.  The days are visibly longer and brighter, and so much warmer (a 40-degree temperature today feels almost balmy in comparison to last week!).  For a pick-me-up, I recently redecorated this mantle shelf in the dining area.  I usually keep everything silver and white for the month of January, but I really needed to see some color, so I moved the kalanchoe plant up there, added the silk Gerber daisies from Michael's Crafts, and tied on my Valentine's Day heart bunting.  It feels like a breath of fresh air!


Here's a close up of two of the other gifts I bought myself last week - the little wire birdcage candle holder, and those sweet little clip-on birds (also from Michael's).  I felt like I needed something cheerful and fun, and they were just the ticket.  I bought a couple in yellow as well and placed them in strategic places around the house where I will see them and remember to think happy thoughts.

Maybe that's what sparked the idea to use up the rest of my silver artclay on these three bird charms.  I used about half the clay on a Christmas gift for my DH, and the package suggests you don't store extra clay too long after the bag is opened.  Even moistened, rewrapped, and double sealed in plastic, the clay was quite dry and took a lot of working to get it smooth again.  It was a bit more difficult to work with than it was in the fall (I think next time I'll buy the slow-drying version).  The birds still turned out pretty well - I had a little trouble getting the wings to look neat because the clay was so dry, but I managed to work them and rework them and file them after the clay was dry to come up with a bird I was satisfied with.  I'll add them to my spring/bird themed charm bracelets.

Finally, I reworked my "architectural elements" project.  In this post, I used a photo of Tuscany which I printed on fabric, but the colors seemed very faded, and I felt more sky needed to be showing if it's a view from a window.  So I decided to use the photo of Tuscany as inspiration, rather than using the actual photo.  I began by painting some sky on plain white fabric and and then fused on the reverse side of several fabrics to look like mountains in the distance.  I'm playing with various prints and upholstery scraps to create a landscape that looks rustic and agricultural, hinting at vineyards, groves of olive trees, and cultivated fields.  I still need to add details like cyprus trees, as well as more things in the foreground, but at least I'm making progress.
What have you been up to?

Tuesday, October 22, 2013

Catching Up

I've been away a few weeks, primarily because my laptop needed more memory and an updated operating system, so I was unable to download any new photos.  Now that I've got that all straightened out, I can catch you up on the final four round robin charm bracelets.  These were delayed too, as I was supposed to receive the crystal one, below, in August, but only got it in early October.  At one point, I had all four bracelets to work on at once, so I'm catching up in more ways than one!
On this "crystal bliss" bracelet, I added the little silver snowflake with the crystal dangles in the lower right.

Below is another steampunk themed bracelet.  I added two charms on the bottom, on either side of the gold gears.  One is a wire-wrapped green glass bead in a copper frame with a chain tassle, the other is the gear with the three beaded dangles.  I like the green and copper combo in this bracelet and used that as my inspiration.

The theme for this one was "Grandma's button box."  I added the floral button on the lower left with the lace since I didn't have any truly vintage buttons.

And finally, I added the heart-shaped lavender sachet to this amethyst and silver bracelet (near the clasp in the upper right).  This bracelet will be going to a grandmother who plans to give it to her daughter, who has a little girl who was born last February.  She will eventually inherit this special birthstone bracelet.  Isn't it lovely?

That marks the end of my participation in the round robin bracelet swap!  All year, I really looked forward to seeing a new themed bracelet every month and taking my time coming up with a charm that would compliment the ones already added.  I'm very glad I participated and I know I'll miss the gentle nudge the project gave me to do something creative, albeit small, at least once a month.  And I'm really looking forward to receiving my own bracelet back in early December!

Wednesday, September 4, 2013

Autumn Inspirations


You may have noticed that I haven't been as creatively productive lately as I usually am.  I guess I've been busy with the garden and trying to make the most of the lazy summer days (in other words, I've been reading!).  But the ArtCharms Yahoo group recently started an Autumn Leaf swap, and it sounded too good to pass up!  I ordered the small copper leaves, shown above, and enhanced them with some color.  They look as though they've been enameled, but I actually used something much more mundane and common - can you guess what it is?  Not acrylic paint...    It's plain old, drug-store variety NAIL POLISH!  My girls have boxes full of nail polish, in many colors, including orange and yellow, so I thought I would take advantage of the supplies at hand.  I'm pretty happy with the results;  I need to make a total of 21 charms, so this should keep me busy for the next week or so.

I also decided to enter another challenge in Cloth Paper Scissors magazine - a mixed-media stitched challenge.  The finished piece had to be 6"x6" and have three different media.  My friend Norma has been posting about her adventures using copper sheeting, and it reminded me that I had some in my stash that I hadn't played with in a while.  I guess my wandering mind combined the thoughts of autumn leaves with the copper and I came up with the idea below.  The backgrounds are fabrics, the tree trunk is paper layered on fabric with gel medium, and the leaves were cut from copper sheeting tinted with alcohol inks.  I decided to turn the square on point to make the tree fit better.  What do you think?

Friday, July 26, 2013

Getting Back in the Groove


For some reason, I haven't been very motivated to create lately (or even blog regularly, for that matter!).  I don't know if it's my busy summer work (and home) schedule, the oppressive heat we've been having, or the sacro-iliac joint dysfunction I've been struggling with, but I just haven't had the impetus to get downstairs and make anything.  All I feel like doing after a busy day is strolling down to the garden for a few minutes and then relaxing with a good book!  But my schedule is gradually easing up a bit (I have one or two more busy weeks), so I'm finally beginning to think about new ideas for art quilts and auditioning some fabric combinations, above.  (Can you guess what's on my mind from the fabrics pictured?  I'm so predictable!)

Today I even had the day off work, so I made a detour to the craft store before my grocery run.  I wasn't really looking for anything specific, but all the strung beads were half price, and a few things caught my eye...


 Some of the upcoming round robin bracelet themes are "crystal bliss," "steampunk," and "amythyst and silver" so I kept that in mind as I shopped.  Those open rings in various metal finishes looked interesting and different.   I started thinking about the possible combinations of metals and beads that might go in the center.  I found several things that could work, and knew I had some things already at home as well.  After the groceries were all put away, I had a little time to play around.  Here are some of the combinations I came up with:


The one with the gunmetal ring and black crystal might work for the Steampunk theme and the other one for the amythyst and silver.  Then, just for fun, I tried the distressed brass finish with some emerald crystals.  I really like these!

Finally, I tried these copper rings with pressed glass leaves in the center.  I think these are my favorite, but the copper blends with my hair so much that they hardly show on me!  I may use them for charms instead of earrings.  One of them would look great on my "Mother Nature" themed bracelet!
So now all my new craft room furniture is covered with a mess of beads and fabric but at least I'm getting back in the groove!

Tuesday, July 23, 2013

Next Two Bracelets


Between gardening, work, and family summer fun, I've managed to squeeze in some charm making for the round robin bracelet charm swap.  It's been a fun project because it's not a huge investment in any way, most especially time, but it keeps the creative juices flowing.  Above is the bracelet I mailed out on July 1st, with a "By the Sea" theme.  I was surprised to see most of the charms already added were pale or pearly and without a lot of color.  I added the sliced shell with a little glass teardrop bead, the beach glass look bead, and the blue wavy disc in the background which says "breathe."  I'm technically only supposed to add one, but sometimes it's just too hard to make the decision!

Below is the charm for the next bracelet, which is mailed on August 1st.  The theme was "Mona Lisa Smile" and I had no idea what I might create for this!  The bracelet had lots of images of the Mona Lisa, some complete and some partial, and I felt it didn't need any more.  I opted for this painter's palette and mini paintbrush.  I'm happy with the way it all turned out.  The paintbrush was particularly tricky - I used a very narrow piece of copper tubing, some thin copper wire, and some embroidery floss. 


I decided to forge Da Vinci's signature on the back.  Pretty funny, right?

I also chose paint colors that might be found in the original painting and were prevalent in the other charms - deep, rich jewel tones.  Here is the whole bracelet below.  It's really looking great, don't you think?  I'm sure the owner of it will be really pleased when she gets it back in December.

Thursday, May 16, 2013

Another Charm Break


Last week I packed up and mailed out my 25 charms for the Mermaid's Treasure swap.  I tried working those sliced shells into the charm, but thought it looked too cluttered.  I wanted to include them anyway, since they're so unusual and cool looking, so I dangled a little bead off one hole of the shell, put a jump ring on it and included it in the package as a second bonus charm.

Then I started thinking about the next charm for the bracelet Round Robin.  The theme of the bracelet I have now is Steampunk/Alchemy.  The journal she included with the bracelet was so cool, as you can see below.

Inside, her pages looked aged and were all decorated with gears and symbols as you can see.  Each page was really an envelope that had a folded, lined page tucked inside, for each recipient to write about the charm they created.  There was one for every month of the year.


The charms already on the bracelet included a tiny hand-stitched leather top hat, a pair of goggles with crystal lenses, and of course, a lot of gears, keys, and key holes.  I wanted to make something different from all of these, and her journal gave me the inspiration I needed.  I decided to make a tiny book with alchemical symbols for the pages!

To make this, I used whatever materials I had around the craft room.  I looked for a scrap of leather for the cover, but didn't have one, so I wrinkled up a piece of brown craft paper and painted it with acrylic paint.  I glued it to three pieces of cardboard, wrapped it around, and glued it neatly.  Then I decorated it with the symbol for gold and some pretend writing using a gold gel pen.


I cut, folded, and aged some pages using Distress Inks, then drew some symbols I found by doing a Google search for alchemy symbols.  I even rubbed the edges of the pages on a gold stamp pad to give it that gilded look.

I added two copper loops to keep it closed with a lobster claw clasp, which I hung from a chain attached to the jump ring along the spine. I also hung a key charm from the chain.  Here's the finished charm hanging on the bracelet with the other charms.  Isn't the whole bracelet so cool?  It has such a mysterious and fun aura about it - and it will still have 7 more charm added along the way!  These Round Robin bracelets are fun because you only need to make one charm, so you can spend some extra time on it and make it really special!

Friday, May 3, 2013

Another Charm Interlude


When I signed up for the "Mermaid's Treasure" charm swap last month, I knew it would be tight timewise, with our momentous trip to Florence in the middle.  I knew I had a stash of potential materials and before we left, I played around with a few ideas like this one and the one above.  I've had those sliced shells for a long time and since I need to make 26 of these, I thought that might me an unusual and simple solution. 

But after thinking about it, I realized I wanted to try getting an actual mermaid into the charm somehow.  I decided to try playing around with using my Shrinky Dinks for Inkjet printers.  I've tried if before and the big trick seems to be lightening the colors of the original picture enough so that when the plastic shrinks and the colors darken, they won't be too dark.  

So I started with a line drawing of a mermaid.  I traced it onto another sheet of paper and colored it in using Inktense watercolor pencils, then scanned it into my laptop.

From there, I lightened it considerably, then put it into a word document, shrank it down, and fit nine onto a page.  This is how they looked printed onto the shrink film.

Then I washed some blue acrylic ink over the back side, cut them into ovals, and punched a hole at the top.  Straight out of the oven, the surface has no shine, so I added a small jewel and then put on a layer of Mod Podge's Dimensional Magic.  Here is a sample, front and back.  Pretty neat, huh?  The color is not exactly what the original was, but it works pretty well!  Now I can send 26 copies of my miniturized original art out into the world for other charm collectors to enjoy!

Friday, April 12, 2013

Indoor Pursuits


Although we had some nice spring weather earlier in the week, today has been wet, windy, and just plain unpleasant - a perfect day for satisfying indoor tasks like baking, finishing up old projects, tidying up all around, and maybe starting some new projects!


After doing a bit of cleaning upstairs, I headed downstairs to make the final stitches and adjustments to my kimono.  Both sleeves are done as you can see, and I added the final embellishments, like the carved tree frog and shiny fish tail, below.  It's bright, colorful, and interesting to look at, so I hope we can find a suitable spot to hang it after the display the first weekend in May (see previous post).


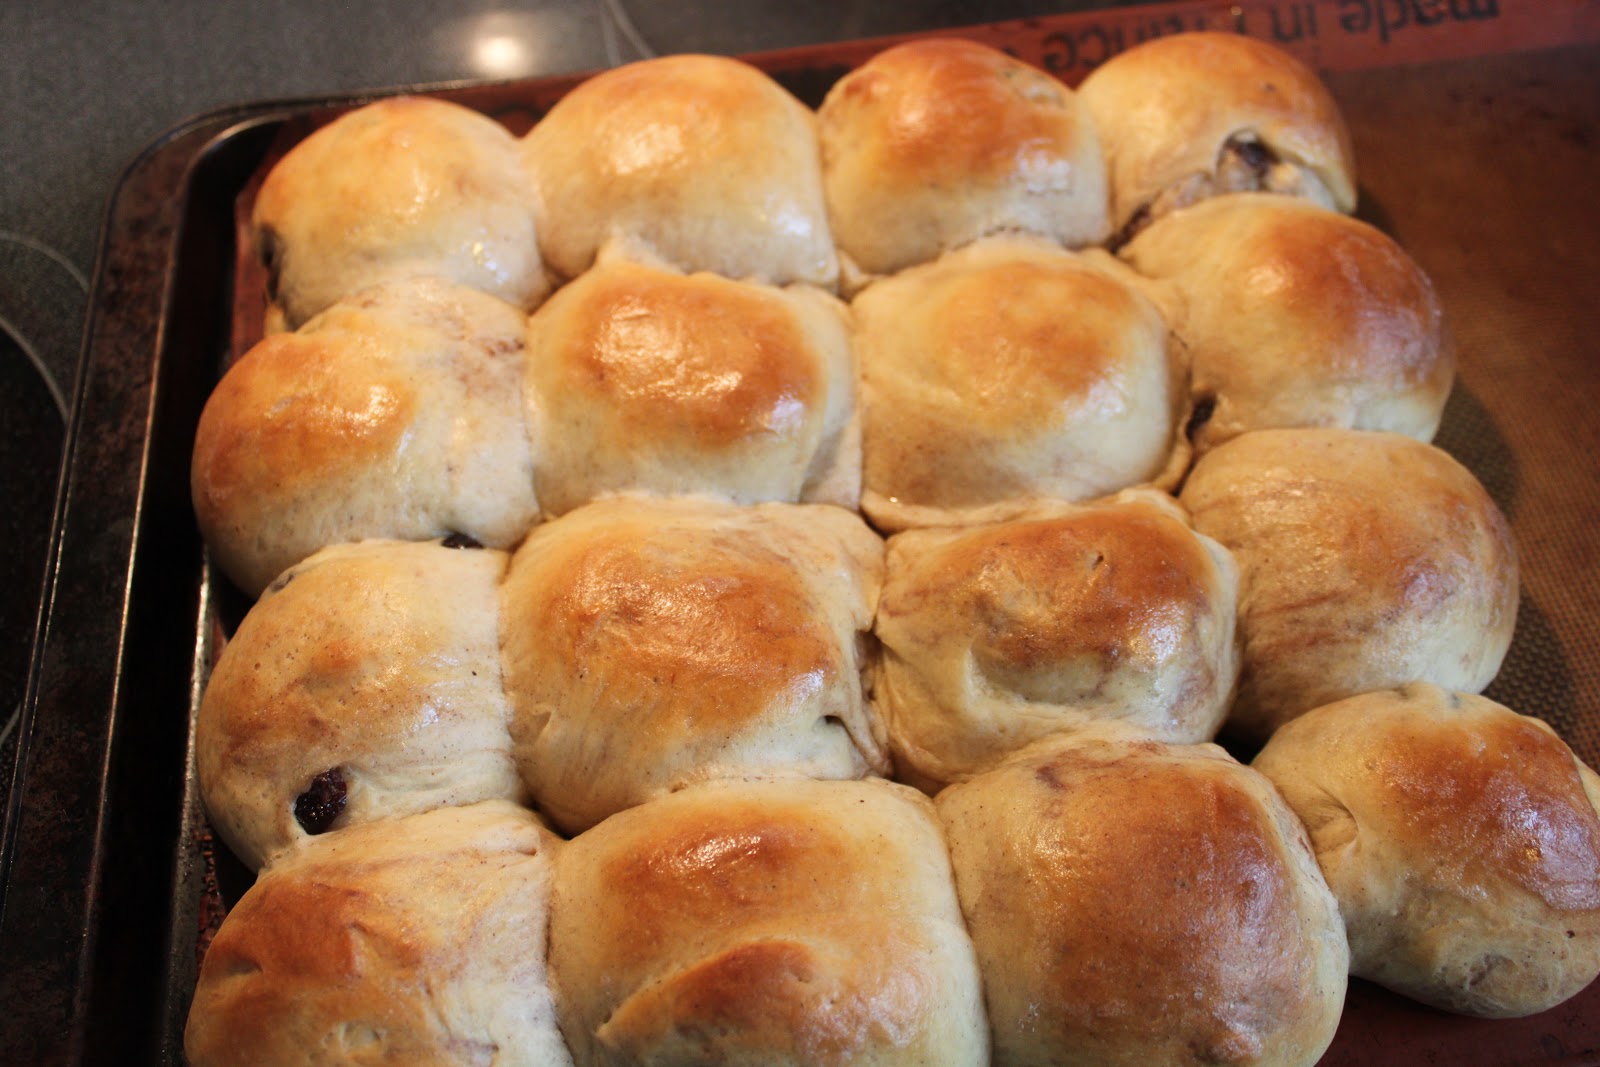
Before I did all that, I got it in my head to do a little baking.  Before Easter, I bought some hot cross buns in the grocery store that looked delicious but were sadly dry and stale (I actually brought them back, they were so bad!).  Every once in a while, I love a fresh baked sweet roll, so I decided to try a recipe I found in the back of the 7th Yada Yada Prayer Group book.  This recipe calls for raisins and cinnamon and they smelled delicious every step of the way.  Here they are fresh out of the oven:


They went nicely with my light lunch!  The recipe calls for a light glaze, which I didn't put on, but the buns could actually use a bit more sweetness, so maybe I'll mix up the glaze and put it on the remaining buns in the traditional cross shape.

While I was eating, I took a few moments to admire the little "fairy garden" I started yesterday.  I had that shallow wooden container lying around and have been meaning to fill it with some moss, tiny plants, interesting rocks, and whatever else I could come up with.  While I was out in the backyard with Cassie yesterday, I came across a patch of those cute little wild violets already in bloom.  I dug up a couple and nestled them in with some moss and another low-growing plant.  I'll have to see if I have time to make some cute mushrooms or a little gnome out of polymer clay, or maybe some little garden structures out of bark or craft sticks.  If you want to see some other great fairy garden ideas, just type those words into google images - there are many wonderful, creative, inspiring, fun samples posted on the web!

 After lunch, I went back downstairs and completely cleaned up my worktable!  I was able to put away all the fabrics I used for the kimono, cleaned and oiled my sewing machine, wiped my sewing table clean of loose threads, dust, and cat dander, and vacuumed everything completely!  It felt great to get it all tidied up and ready for the next project.

Speaking of the next project, I received my next bracelet in the round-robin swap.  This is the final bracelet with a bird theme (it is getting a little boring), and the colors for this one are blue and pearl with silver findings.  It will go back to Peggy Krzyzewski, one of the co-authors of Making Mixed-Media Art Charms and Jewelry  and leaders of the yahoo artcharms group.  Through the group, I've come to know Peggy is extremely talented, experienced, knowledgeable, and generous with her time and talents, so I want this charm to be special for her.

I've worked within a bird theme before, so I already had a few things in my stash that I could play around with, and one of them was the silver-tone wing on the right below.  For some reason, the phrase "a wing and a prayer" kept going through my head, so I decided to try making a small charm with a prayer on it.  I took a page from an old church missalette I swiped years ago and mod-podged it onto a piece of heavy weight watercolor paper, then layered tissue paper over that.  I stamped with a music stamp and silver ink on that, then cut it out, added the eyelet, and coated the whole thing with Mod Podge Dimensional Magic, which protects it and gives it that nice shine.  Together with the wing and the little egg-shaped pearl, it will make a nice addition to her bracelet.  But I also had some shrink-film birds I had printed with our inkject printer, so I decided to coat that with the Dimensional Magic as well, and see which charm I like better.  The reverse side says "bluebird of happiness," as you can see below.  Maybe I'll add a little beaded dangle to it and send them both...

I haven't been swapping charms as much since last summer - too many other things going on I guess, but when the latest swap theme came up, I thought I'd join in again - it's "the mermaid and her treasures" - right up my alley!  I have lots of stuff in my stash already that would work for this theme, but I remembered early this morning that I saved these old stamps from a kit the girls had.  I thought I remembered a mermaid in there, and I was right!  This swap requires 26 charms, so I always look for ways to make them inexpensively and repetitively.  A stamp would be a good way to go.  She looks a little bit childlike (or childish), definitely styled for kids, so I'm not sure if I'll use them, but here are the charms I made, below.  These do not have to be finished until the first week in May, so I have time to play around with some other ideas before I decide.  I can even make several different designs if I want, all 26 don't have to be the same.

The rain has almost stopped so maybe I'll run out to the mailbox and see if the latest issue of Cloth Paper Scissors is here - it's supposed to have a bird theme this month!  Have a nice weekend, everyone!

Tuesday, April 2, 2013

Another Charm Sent Off


Here's the final charm for my latest round-robin bracelet.  I think the concept of "world peace" comes across, don't you?

Wednesday, February 13, 2013

Taking a Charm Break

While I'm mulling over various ideas for the next FANE challenge, I decided to work on the next charm for our round robin swap.  This bracelet's theme is "Birds of a Feather," which is already obvious with only 3 charms.  The bracelet originator made the enameled bird on the left (I wonder how you do that...), the next person altered a scrabble tile to make her cute nest charm, and I opted for another version of the polyclay bird and birdhouse I made last spring for a swap.  I chose those muted colors to match the distressed bronze of her bracelet.  Seems to work.


Thursday, January 31, 2013

Vintage Found Objects Bracelet


It's already time to mail out the round robin bracelet I received at the beginning of the month!  As I explained in this post, each participant chose a theme and this bracelet's theme is "Vintage Found Objects." As you can see from the above photo, Brigitte would like antique-y looking charms with a distressed brass or silver metal.  You can't buy vintage at the local craft store, but I went through my stash to see what I could dig up. 

I came across these packages of lace and trim that I inherited from my mother, and she from her mother - they must be considered "vintage," right?  (39 cents for 4 yards?  3 packs for $1?  Wow!).  I thought the bracelet could use a touch of antique lace somewhere.

 Then I went through this stash of old jewelry that my next door neighber left for the girls before she moved away last June.  They took what they wanted and I kept anything I thought might be useful.  There are some nice freshwater pearl, carved stone beads, and artful metal pieces.
 This rather large earring caught my eye because of the distressed finish on the silver.  I decided to remove one of the shorter dangles.

But this is an Art Charm, and it should have some sort of handmade element to it.  Remembering the lace, I decided to tea-dye a small piece, stitch it into a little collar and put it around the dangle, as you see below.  I actually  made this almost as soon as I received the bracelet, but waited to see if I could come up with any other ideas.  I did create another charm out of a flower-shaped button, but decided to stick with the heart, pearl, and lace.

I think it really blends nicely with the charms Brigitte already made.

Incidentally, I recently bought a spray sealer called "Preserve Your Memories II."  In the book Mixed-Media Art Charms and Jewelry, Peggy Krzyzewski mentions it as a great all-around sealer, especially for polymer clay, which can sometimes react to other sealers and become soft or sticky.  I sprayed the little lace collar with this to protect it from water, perfume or other elements it might come in contact with.

I'm finding that this PYM II is a really terrific product.  It's made in the USA, dries quickly, has a low odor, and can be used on many materials, including paper.  I resisted buying it at first because I can't get it nearby at a store and had to order it online.  The shipping costs (it must be shipped UPS ground) brought the cost to nearly $20, when I knew I could get something "similar" at Michaels with my 40% off coupon.

 I've ended up buying spray after spray, and either they smell really toxic or don't dry completely and feel sticky.  I'll have to find some project to use these up on!  If you need a good low-odor, all-purpose sealer, try the PYM II first!  (I bought it here - and watch the video, it's short but helpful).