Pages

Saturday, June 30, 2012

Wearable Art

Cloth Paper Scissors magazine's May/June issue was all about wearable art.  That's something I don't do a lot of (besides jewelry) but when I recently pulled out a solid salmon colored tee shirt that I bought to go with these plaid seersucker cropped pants, I thought it could use a bit of embellishment.
 I started with a sketch of a seahorse (what else) and transferred the design onto a piece of thick craft foam.  I've used foam to make stamps before, but I always cut them into shapes which I then glued onto  some sort of base and dipped in paint to make a print.  This time, I wanted a little more detail.  I'd read that you can simply use a pen to sort of gouge out a design onto the foam and use that to print.

The results were pretty good, for a first try.  Luckily, I thought of putting down an initial layer of a light cream colored paint as a background before I printed my seahorse.  Otherwise, there wouldn't have been enough contrast between the shirt color and the coppery metallic paint I chose to use.  Here is a shot of the prints on the shirt...

 And below is a close-up.  I like it, but I think it still needs something.  I could certainly stitch on a sequin for the eye, and maybe while I've got a needle threaded, I'll do some other embroidery around the border or to add more definition.
Meanwhile, I have four more tee shirts that could use some jazzing up!  I bought these for about $2.50 last summer, thinking the girls would each have fun decorating one, but we never found the time.  We still have another week before camp gets going, so maybe we'll fit it in this year.  And I saw some great (and cheap!) plain white canvas sneakers at K-mart the other day - they would be fun to personalize with paint!  Think of the possibilities!

Wednesday, June 27, 2012

S'more Anyone?

With the Fourth of July coming up, my ArtCharms Yahoo group is holding a Picnic themed swap.  I played around with my polymer clay and came up with these cute little picnic foods.  I finished the watermelon, but I need to make s'more s'mores.   Picnic, anyone?

Monday, June 25, 2012

Renga Layer Added

Now that my studio is all clean and tidy, I had time to dig out some acrylic paint and add a layer onto the fabric I received in our FANE group Renga.  I went with my original idea, which was to echo the circles Carolyn already started using silver paint.  I dipped cans of various sizes into the paint to print the circles in a random way.  I had to really stop myself from going overboard, as two more people will have to add more layers on top of this.  I hope I succeeded!  Here's a close-up of one section.  The inks Carolyn used have a little bit of glimmer to them, so I think the silver works well with that and the original color scheme.  On July 12th, I get to pass this onto the next person in the group, I receive another piece that already has two layers on it, and I get to see how my piece of fabric is progressing!

Also, in the process of cleaning and finishing up miscellaneous projects, I finally hung my totem!  We have a high ceiling in the entryway which is really the only place it will fit, so I coaxed my Dear Husband up on a ladder and he kindly hung it for me.  Here are a couple of shots so you can see how it looks:
 There is other art in the entryway, some of it mine, some created by the girls, so it's a good spot for it.  In this shot I'm standing in the living room near the piano, so it's visible from there.  I wonder what people coming to the house will say about it...

Friday, June 22, 2012

Studio Progress

 Remember this?  This is what my studio looked like three weeks ago.  Horrible isn't it?  I should be mortified to even be posting this picture, not once, but twice!  I'm doing it so the HUGE improvements that have been made will be blatantly obvious!  But I'm not going to show you everything at once.  First, here is a close-up shot of the cabinet where I kept some craft supplies, the top of which also serves as a small ironing station.  This is the before shot:
 And here is after!

Tons better, don't you agree?  I broke down and bought myself a travel ironing pad which was just the perfect size for the top of that cabinet so there's no more sloppy ends hanging down.  That one was also terribly stained from all the times I used the iron to heat-set paint or dye and forgot to put down a silicone protective sheet.  I'll be more careful with this one!  We actually have the door to the cabinet too, but my husband removed it several years ago when the girls used it to store their Barbie toys and now I can't find the hinges he took off!  The piece is from Ikea and I know I can get replacement hinges.  They only cost a couple of bucks but the shipping charges were ridiculous so I haven't ordered them yet.  Maybe next time we're in Jersey or on LI we'll stop at the stores there.  Then everything on those shelves will be kept out of sight.


Next, here's a close-up shot of the storage cubbies on the other wall.  As I said before, these used to hold the girls toys and games and I've slowly been taking them over one by one.  In order to get maximum use of each cubby, I sometimes stacked storage boxes and piled things up.

I went through all those bins and cubbies, condensed all the items or got rid of them, and moved my fabric storage here in white cardboard boxes from Staples.  This is what the shelf looks like now:

 HUGE improvement, right?  I plan on neatening it up even more by adding some more recycled cans (like the one holding the paint brushes) to store markers, pens, and pencils.  Some of the girls' things are still on the shelf to the far right, and when I figure out what to do with them, they will be gone too!  I'm also still trying to come up with a way of covering up the chart on the front of those boxes.  At first, I thought maybe white contact paper, but I think the lines will still show through.  I could paint them, but that would also probably require several layers.   Anyone got any suggestions?  Paint them first, then use contact paper?  Hmmm.

Below is the view of my sewing table.  It still has the remnants of some projects I'm finishing up, but it looks a whole lot better than it did.  I reorganized the little drawers on the right and decluttered the ledge near the window and the shelf next to it.  That window is at ground level and tends to get splashed with dirt when it rains, as well as getting covered in cobwebs in the summer.  I usually just try to ignore the dirt, knowing that soon after I clean it, it will only get dirty again.  But this time I swept off all the dirt and thoroughly cleaned it so the light coming through is clean and clear.  It makes such a difference!  I'll have to make a point of taking the time to do that several times a year.  It really only took a few minutes!

 Finally, here is a shot of the whole space so far.  I still have some odds & ends I need to deal with.  It's tempting to try to keep and store even the smallest scraps because sometimes when I'm making these little postcards, ATCs, or charms, a tiny scrap is all you need!  But I keep telling myself that a neat and organized area is more valuable to me than a messy pile of little scraps, which helps me toss things out. I'm not completely finished with the reorganization, but I'm 90% there, and it's such a relief!  Over the summer, I hope to tackle the rest of the house!  (I'll let you know how that goes!).

Wednesday, June 20, 2012

Romantic Country Wedding

 Last weekend we attended a lovely wedding - that of my older sister.  Since it was a second marriage for them both and because they wanted to keep things simple, they made it a casual affair and held it in the restored barn of a good friend.  All the guests brought a dish and some of her best friends took care of all the set-up and clean-up.  It was a truly memorable, old-fashioned kind of wedding!


This is the inside of the barn all set up with tables.  The four barn doors were open, which created a beautiful, wholesome light, as well as allowing cool breezes to waft through.  Prior to this arrangement, seats were set in an arc as the happy couple made their vows.

Here is the building from the outside.  Entertainment for the kids was the good old-fashioned kind:  red wagons,  

. . .  wooden swings,


. . . admiring nature,


. . . and eating cake while sitting on the cool grass!


Even my sister's dogs were part of the action!  Doesn't Summer look sweet in her flowered collar-wreath? 
It was a true celebration of life, love, and family.  I think it reminded us all of what is truly important in life.

Note:  All above photos of the children playing were taken by my daughter, Chelsea!  Doesn't she have a unique way of capturing the action?  I love how those shots capture the motion and playfulness of the children!

Monday, June 18, 2012

Taking a Little Reading Break

Since I've sort of been on a hiatus from big creative projects, in addition to cleaning and getting organized, I've been reading!  Seems like a long time since I've dug into any good fiction, so I've been reading a lot in the last few weeks.  It's such a great escape for me.  Here's some of my recent picks:

I really enjoyed The Wolf Gift by Anne Rice.  Even though I'm kind of tired of the whole vampire/werewolf overload in books and movies lately, she's such a great writer, I thought I'd give it a try.  It was fast-paced version of a wolf-transformation story set in Northern California, near the Redwood forest.  There is a nice twist in this version, as the character who becomes a man-wolf can sense evil and hear victims of violent crimes calling for help.  He becomes sort of a were-wolf super hero!  Sounds corny, I know, but it was a fun, fantastical, and even romantic read.
After that, I switched pace to some good Young Adult (YA) lit, in hopes of finding things I can recommend for my daughters this summer.  I started with The Mermaid's Mirror by L.K. Madigan.  My girls used to love anything that had mermaids.  We had movies, books, Barbie's and costumes that were all mermaids!  I hope some of them will pick this one up this summer.  It's about a high-school girl living in California who wants to learn to surf, but for some mysterious reason, her father has forbidden it.  The story progresse as she sees what she thinks is a mermaid (or could it just be a seal) in the water, and then discovers a curious mirror among her dead mother's things.  It's another fantasy, with an air of mystery and romance similar to the old fashioned fairy tales, but set in modern times with a believable teenaged main character.

 A story I enjoyed even more than that was The Running Dream by Wendelin Van Draanen.  It's about a high-school track star who loses her leg below the knee in a bus accident.  Told from her point of view, the story emphasizes her total despair at not being able to run anymore.  She makes slow progress  in the hospital, then at home, and finally returns to school in a wheel chair and on crutches.  As she begins the process of being fitted for a prosthetic leg, she meets another bright girl who is permanently wheel-chair-bound due to cerebral palsy.  The main character and entire community go through a major transformation as they work together to overcome the tragic bus accident, turning a tragedy into a victory.  I highly recommend this optimistic, uplifting book.


I also read two older books that have become classics.  These are both on the required reading list for my daughters over the summer.  I had never read The Five People You Meet in Heaven, although it's been around a while and has even been made into a movie.  I did enjoy it, but I'm kind of surprised it's required reading for an incoming 9th grader.  It really seems more like an adult book to me, as the main character is an adult and there are many serious topics, and a violent war scene.  I hope my daughter enjoys it.

I finished up with The Witch of Blackbird Pond by Elizabeth George Speare, which I read as a child but didn't really remember.  It's set in 17th century Connecticut, and tells the story of 16-year-old Kit who sails from Barbados after her grandfather's death to Connecticut to live with her aunt, whom she has never met.  She had a difficult adjustment into the Puritan household and stark conditions of early colonial America.  It won the Newbery the year it was published, and contains lots of interesting history as well as telling Kit's story. 

Have you read any good books lately?

Sunday, June 10, 2012

Two New Projects

As I mentioned in my previous post, I've decided to completely clean and reorganize my creative space.    It's been getting to the point where I walk into the room and immediately feel like walking out again because of the overwhelming sense of chaos and disarry.  Believe it or not, I know where everything is and can always locate things I need, but the way it looks has not been conducive to productivity!

One of the reasons I haven't tackled it before now is that I just didn't know exactly what to do about it!  I'd love for it to look like this photo from the Home Decorators Collection Catalog of Martha Stewart Craft room furniture:
Isn't it clean and inviting?  Also expensive and possibly unrealistic.  While I would love to just pitch everything out and starting from scratch, I haven't won that lottery jackpot yet, so I vowed to work with what I have once again.

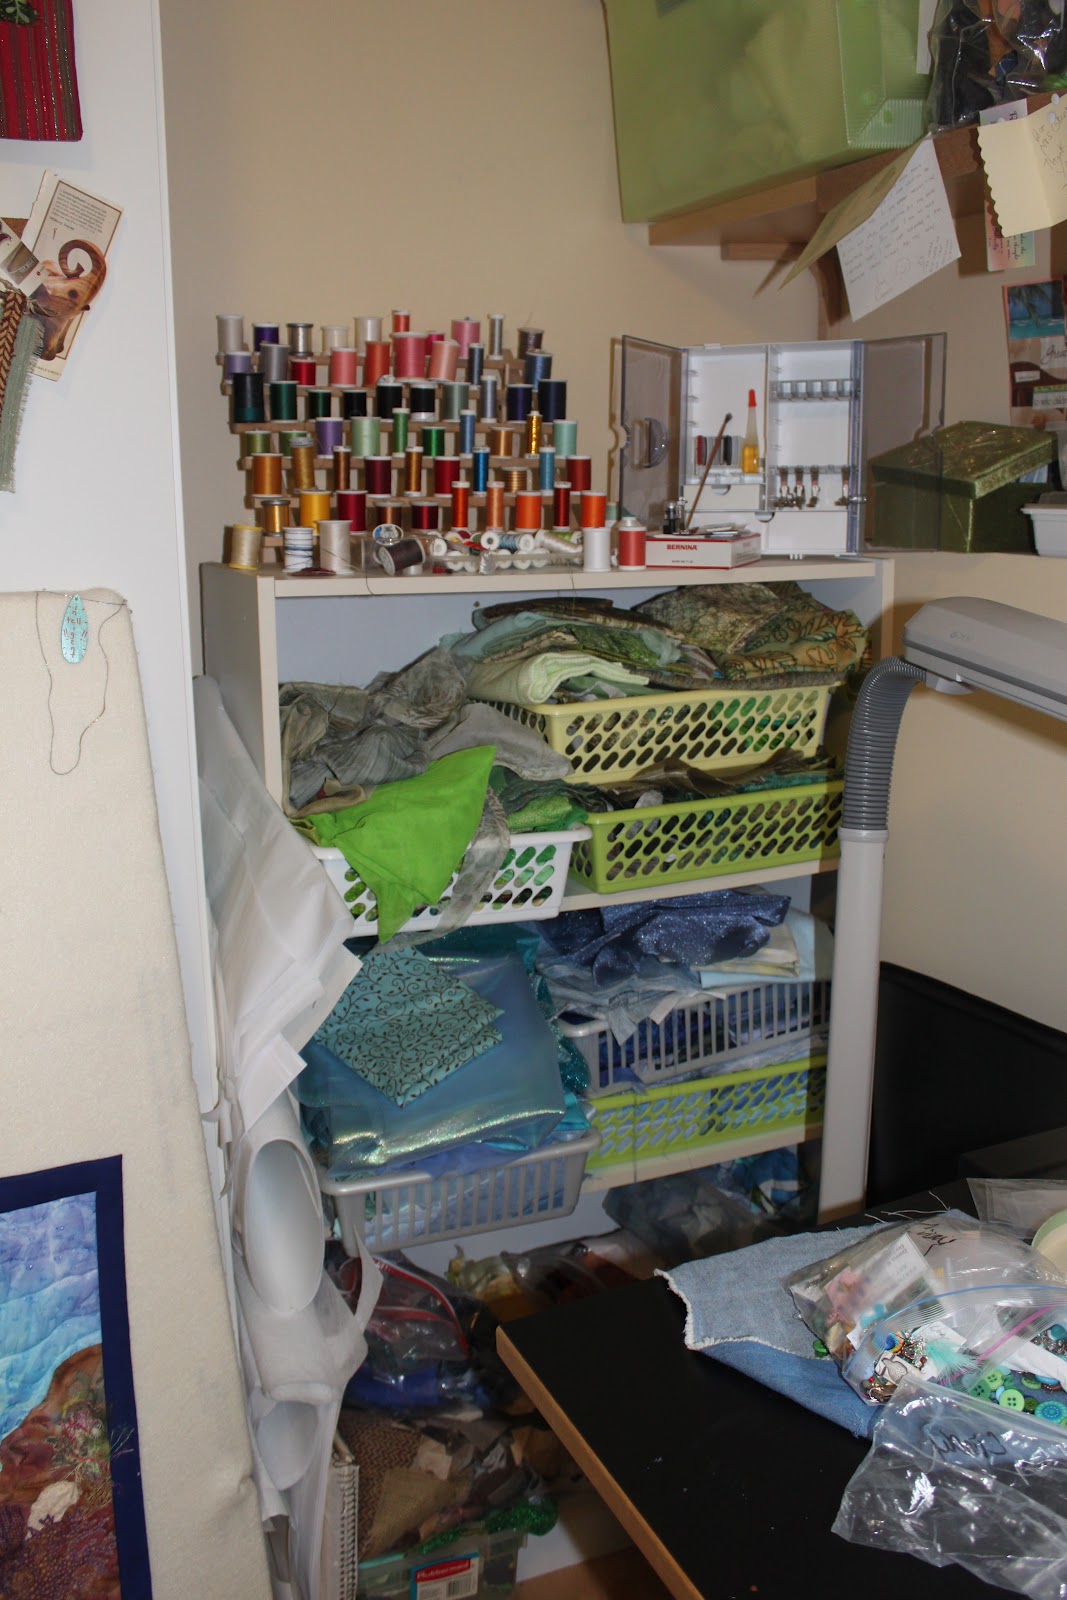
Several years ago, I saw a photo of Margaret Cusack's studio in her book Picture Your World in Applique.  She simply sorted all her fabrics by color and stored them in clean, white cardboard boxes.  The fabrics weren't even folded - just tossed in there, where she could dig around looking for just the one she needed.  That was the only idea I could come up with:  move my fabrics from the open plastic bins they were in as seen here:
 
... to closed cardboard boxes.  This way, the open shelving would look more uniform and neat and I can put the messier supplies behind the cabinets with doors.  I picked up two sets of plain white cardboard boxes from Staples (total spent:  $27) and started moving fabric.  So far, it's looking a lot better, as seen below.  I still may cover the front part with plain white contact paper or something - I'm not wild about the way that chart looks on the front, but at least it's a start!


This shelf right above my sewing table was starting to overflow with extra batting and felt, as you can see below.  Yesterday, I went through those bins and neatened them up to stack, then moved my collection of magazines and books to the right side of the shelf.  (After I went through them to see what I could donate or throw out).

Now the shelf looks like this:

I still need to remove the clutter on the window ledge below the shelf and sort it to see what can be discarded or stored in a more attractive way.  But it's a good start and already a vast improvement! 

I thought I might be able to simply relocate bins from one place to another pretty quickly, but I'm finding that things were in worse shape than I thought.  I'm finding I really need to take the time to pick through all the items in a bin or on a shelf before relocating it somewhere else, so the project is taking a lot longer than I thought it would.  For instance, I've been storing most of my jewelry-making supplies in an old hardware case with drawers.  Each drawer pretty much had a storage catagory (silver findings, copper findings, wooden beads, glass beads etc.) but along the way, some of my sorting rules had become muddled and things were ending up anywhere.  I spent a good part of the morning on Friday going through each and every drawer, labeling them, and separating everything out.  Now it's neat and things are easy to find and easy to put back in the right spot!

Over the next two weeks, my husband will be out of town quite a bit, so I'll have more time in the evenings to continue sorting and reorganizing.  Meanwhile, my FANE group started an interesting surface design "renga" which is a Japanese word that means "round robin."  We each started with a plain white fat quarter and added some sort of surface design element.  I decided to put a resist down first, then used watered-down acrylic paints.  I used the product "Batik-EZ" by Crafter's Pick to make the squiggly lines.  When I put the paint on, I left the fabric loosely balled up in a tray, so the paint would settle into the folds of the fabric.  When it was dry, I heat set it on the back and then soaked it to wash out the resist.  Then I pressed it one more time to heat-set the color.
  

 At our meeting Thursday evening, we broke into random groups of 4.  My fabric will be passed among the other group members over the next three months and each person will add another layer of surface design to the fabric.  Then I'll get it back and I'll have a totally unique piece of fabric!  I wonder what they'll add...  it will be interesting to see!

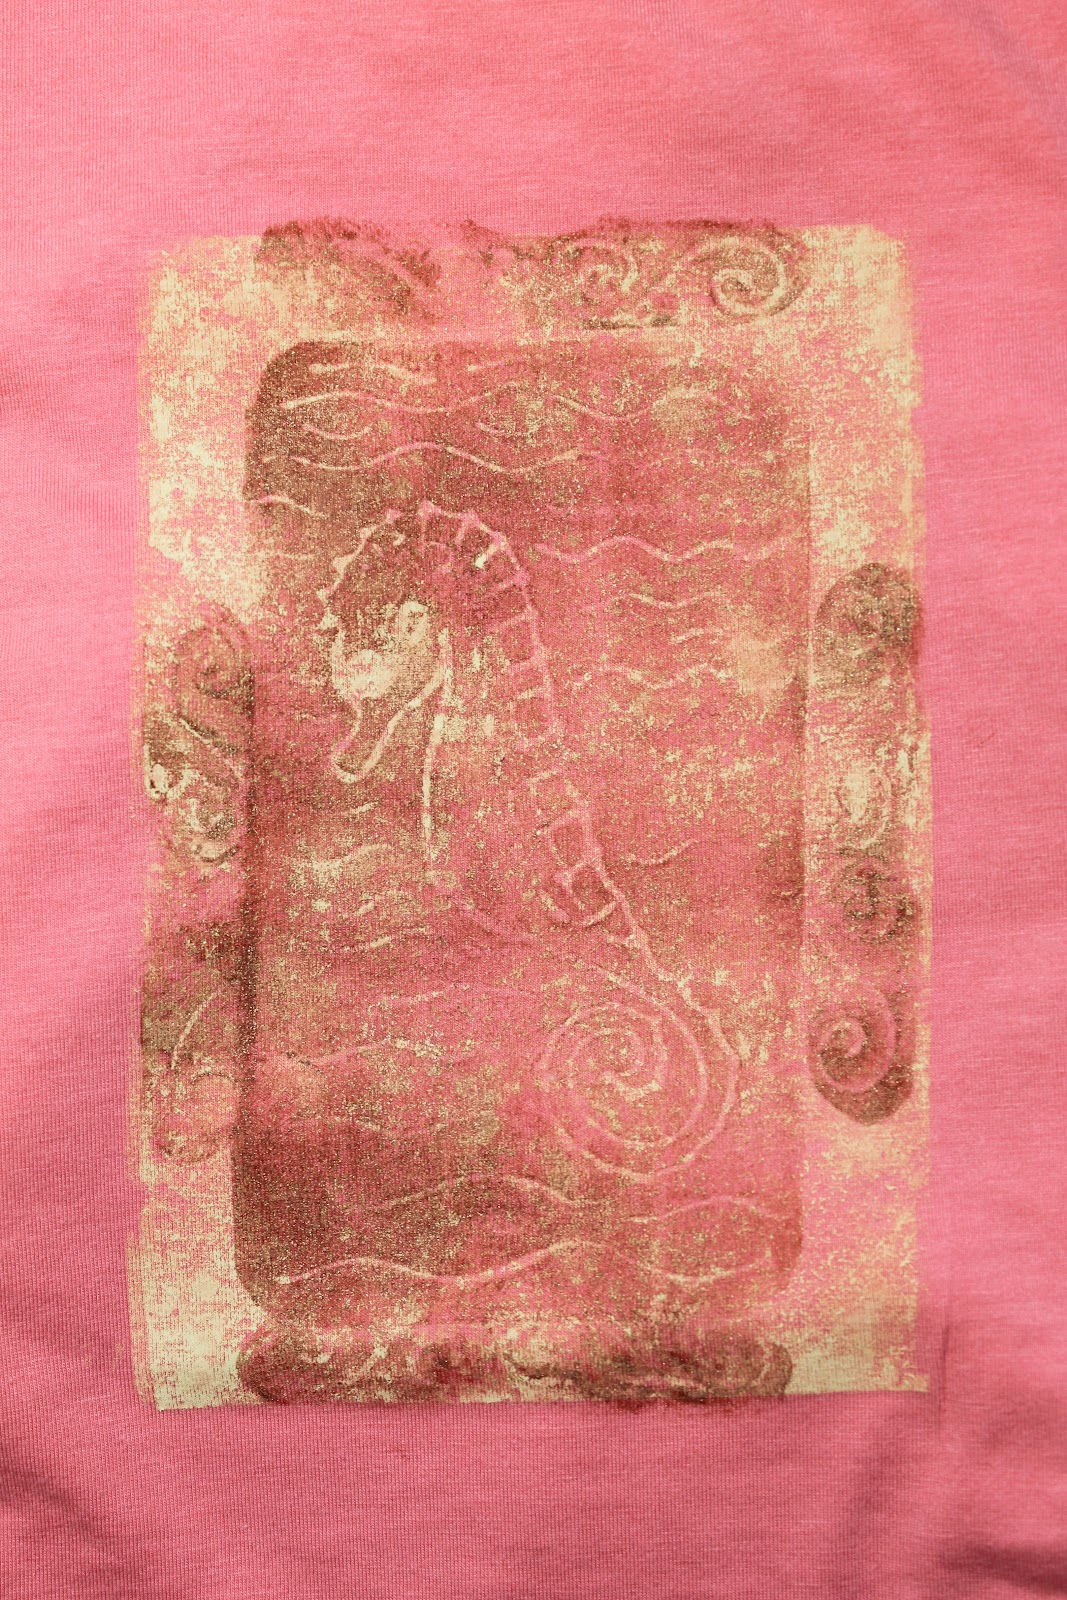
Below is the fabric I received from another group member, that I now have to alter.  The person who started this piece also used a resist, and then painted on permanent inks instead of acrylic paints.  Hmm, what will I add to it?  Maybe a touch of silver paint . . .  I have a whole month to mull it over.  By then, maybe my studio will be completely clean and organized!


Monday, June 4, 2012

Going Retro-Bohemian & Postal!

Although I spent a good amount of time reorganizing my creative space this weekend, and I'm not even halfway done with the job, I decided to take a break from that type of work and play a little this afternoon.  And I finally finished my latest bracelet!  It was inspired by the late 60's - early 70's denim & suede combo, so it's got a retro-bohemian look to it, with peace signs, flowers, & hearts made from natural materials like wood, copper, ceramic, stone, and denim.  It was really fun to create and I love the way it turned out!  Here's a closer look:
 I took a strip of denim and wove it in and out of the links; I think that adds just the right amount of distressed ruggedness and contrast.  How do you like the stamp charm?  I had a bunch of blue and brown stamps that I saved just for this bracelet.  The Liberty Bell reminds me of all the bicentennial celebrations in '76.  The whole thing really takes me back to that time period.

In addition to finishing that, I mailed my charms for the "going postal" swap.  I just decoupaged stamps onto wooden beads, like these below...
or onto round wood discs like these.  I added the beaded dangles as you see here.  My favorite is the Canadian stamp with Queen Elizabeth on it - just in time for her Golden Jubilee celebration.  I thought about keeping that one for myself (the little rose is made of polymer clay) but I don't wear purple much and I'm sure the recipient will get a kick out of it.  Now back to cleaning and reorganizing!